
(From Dimensions kit "Christmas Keepsake Ornaments".)
Flat padded ornaments can be made in many different shapes. The assembly is basically the same "sandwich" but for each one there are different tricks to make sure that the finished ornament is straight, centered and taut. Below I have links to tutorials about circular, octagonal, square and retangular padded ornaments but first here's some general advice.
1/ It you are using something other than the cross stitch fabric for your backing piece choose a fabric that doesn't compete with the cross stitch project. Tone on tone prints are usually a safe bet.
2/ Take steps to make sure that your ornament will be straight and centered. For suggestion on how to achieve that see the following blog page.
Centering your stitched fabric
3/ When you fasten the fabric to the back of the mounting board pull it nice and tight.
4/ Don't apply glue to the center when you are gluing the ornament "sandwich" together. Just apply the glue to the edges. Some parts at the edge of your ornament may have 6 layers of fabric. The center of your ornament will have none. If you force the centers to stick together you will be making the ornament a little concave at the center.
5/ Consider doing a mock up using an unstitched piece of fabric. If you don't want to waste fabric you can use a smaller piece of fabric but it is better to waste a bit of fabric than to put all that time into stitching something and then be unhappy with the finished product.
I have been asked how I decide what shape of padded ornament I will make. When it isn't obvious I will photocopy the stitched piece or place it against a bright window and cover it with a piece of paper. Then I lightly sketch some shapes.
Squares and rectangles are not my favourite shapes for padded ornaments because I like to make perfectly mitred corners and crisp cross stitch fabric does not like to be mitered. Click on the next photo to see my notes on Square and Rectangular Padded Ornaments.

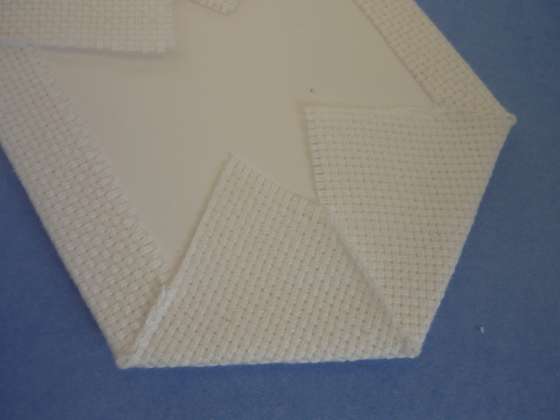
My favourite padded ornament are ones where all the angles are more than 90 degrees. When I choose pentagon, hexagon or octagon shapes I can fold over all the edges and I don't have to fuss with mitred corners.

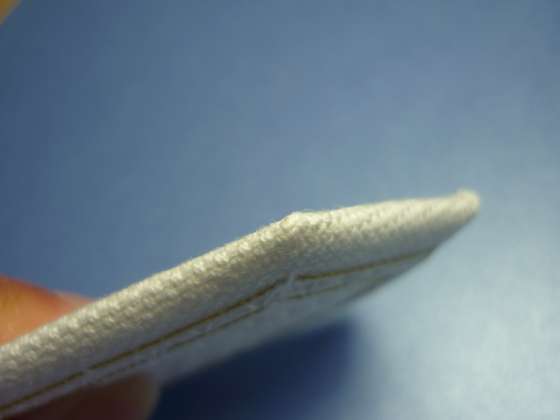
Though if I want to reduce the gap between the front and back of the ornament I might fold the fabric to one side

so that when I put the two pieces together the thickest part of one stacked onto the thinnest part of the other one.

Or if I wanted a thinner ornament I might cut away the excess fabric at the corners.
But if I do I will have to tame the tiny ends of thread that spring up like a crew cut.

I do this by using a tooth pick to apply a dot of fast drying Fabri-Tac glue to each corner, waiting a minute and then pressed the tiny thread ends down and towards the center back of the ornament. (Like slicking down errant hairs.)
Sometimes the cross stitch design is already one of these shapes, like the ornament at the top of this page or this snowflake ornament design by Tor Rhuann Designs.

And sometimes I crop or add to the original design so that I can make 6 or 8 sided ornaments. The original designs for both of these ornaments were rectangular.
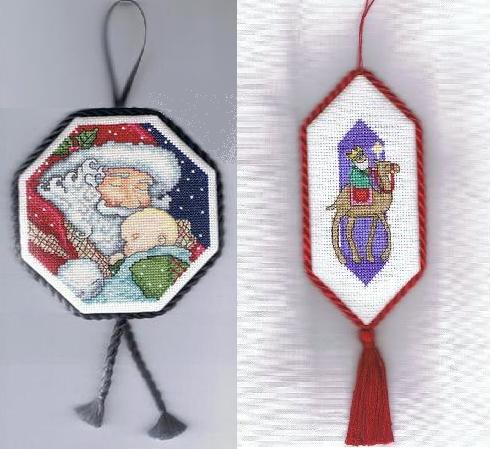
(Santa & Baby is adapted from a Bucilla kit. The Magi is adapted from a design in "Sue Cook's Christmas Cross Stitch Collection".)
Click on the photo below for my Octagonal Padded Ornament Tutorial.

I also enjoy making circular and oval padded ornaments. Click on the photo below for my Circular Padded Ornament Tutorial.


Pinwheel 2008 and 2012

This comment has been removed by the author.
ReplyDeleteEverything is wonderful! Congratulations! Schemes of Christmas patterns where to find it?
ReplyDeleteThis is wonderful. Thank you so much. Favorited it and will follow, because I always hated finishing. Maybe this will make it easier.
ReplyDelete